Sunday, May 31, 2009

Experiment: Sweet Potatoes in Containers


The experiment has officially begun! I have read nothing on growing sweet potatoes in containers. So, aside from what I know about growing them in general --- I'm on my own.


Sweet potatoes are grown from the "slips" or sprouts that appear after you've held onto them too long. I had a few potatoes from the winter, that had taken on lives of their own. Pre-sprouted, even. I also stuck a couple in jars, submerging the ends in water, held in place by toothpicks. Sounds a lot like the low-tech science experiments done in grade school, doesn't it?


When the slips are about 8" long, they are ready to be removed, with a twisting motion and planted. Another shortcut I have taken is to stick the slips in an organic potting medium, so that they can develop a good root system.


Apparently, sweet potatoes do well in a slightly acidic, loamy, sandy soil that is rich in organic matter. Too much nitrogen with produce rampant vines and distorted tubers. A cupful of organic liquid fertilizer per plant, rich in phosphorus will get them off to a good start. One specifically for transplanting should do the trick.


The sweet potato slips have to be kept well-watered to keep them from withering. Sweet potato plants need at least 1" of water per week. Then the amount of water can be decreased as maturity approaches, in order to keep the tubers from cracking.

Wednesday, May 27, 2009

Spiderwort (Tradescantia x Andersonia)


What a curious plant! They open in the shade of the day, and closes in bright sunlight!

  • Like Daylillies and Day flowers, each blossom lasts only one day.
  • The common name refers to the numerous hairs on its sepals and buds. They look like a spider's nest of webs, especially when covered in dew.
  • "wort" is an archaic word for plant.

I love these plants and their "alien-like" appearance. Their strange habits. The fact that they are perennials pleases me to no end. I can expect to behold their wonder, year after year.


Monday, May 25, 2009

Gardening In the 'Hood - Neighborhood Gardens, Part ll

The neighbors that know about my blog keep jokingly saying that I should have named my blog "Ghetto Gardens". This is because we live in the urban core on the southside of our fair city. Whatever, you may say about where we live and garden --- it is beautiful! So, I'm continuing my survey of neighborhood gardens, as there is so much beauty and diversity to be found.


Friday, May 22, 2009

Did You Plant Marigolds in Your Garden this Year?


They are exceptionally easy to grow, and they keep away aphids, thripes, Mexican Bean beetles, squash bugs, tomato hornworms and whiteflies.

Marigolds also repel harmful root node nematodes (soil-dwelling microscopic white worms) that attack tomatoes, potatoes, roses and strawberries. The root of the Marigold excretes a chemical that is toxic to nematodes, and kills them as they enter the soil.

Marigolds will bloom well into November. These flowers make charming and beneficial garden companion plants for many different types of herbs and vegetables: including beans, basil, cabbage, cucumber and tomatoes.


Thursday, May 21, 2009

Richters Loot: The "Piss Off" plant and Mojito Mint


I received a recent order that I made to Richters Herb Specialists in Canada today! The contents being three foundling Piss Off plants and three Mojito Mint plants. Richters is a favorite of mine because of their wild selection of vegetable and herb plants and seeds.

The Piss Off plant is reputed to repel cats, dogs and rabbits. After my earlier experiences with the local feral cats, this sounded pretty good to me. According to the Richters website, "The Piss-Off Plant was developed four years ago in Germany when a Plectranthus canina plant was crossed with a Plectranthus esculentus plant. The goal was to produce an ornamental plant with compact growth habit. It was only later that the plant's unique animal-repelling property was discovered." We'll just have to see.

The Mojito Mint is a native of Cuba and the true mint to use in my favorite Summertime alcoholic concoction. It is mild and warm, not overly sweet like other mints. I tried my hand at overwintering the plant this last winter, but was far from successful. I'm not sure if it was spider mites or just the atmosphere in my greenhouse. At any rate, I was left with sickly, spindly plants that eventually bit the dist. So, I'm psyched to get my hands on these healthy specimens. They will no doubt flourish in the mid-Spring sun.

Wednesday, May 20, 2009

Wordless Wednesday - Neighborhood Gardens

Smoke Bush

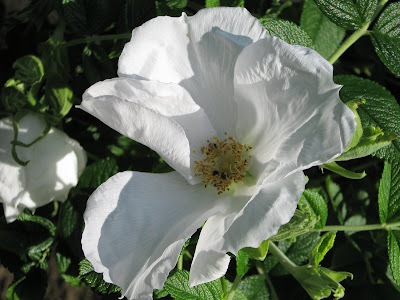
White Regosa

"Improved" Climbing Paul Spaulding Rose

Spirea close-up

Spirea

Natches Mock Orange

Monday, May 18, 2009

Garden Update

The garden space as of 5/19/09

Healthy but naked

What I wouldn't do for a home grown tomato right about now! However, these things take time as anyone who has grown them knows.

Tomato plants like it warm, and the weather has only been mild so far this spring. I haven't grown tomatoes in over 30 years, and I'm excited. This year, I am growing five different varieties of them. The peppers don't excite me as much, but they're pretty cool, too.

As the weather gets warmer I'll add Asparagus Beans, sweet potatoes and cucumbers. I can hardly wait...


Align Center
Jalapeno and Bell pepper plants.


Teenie baby jalapeno peppers

Friday, May 15, 2009

Urban Oasis


Enter a space that is inviting, filled with exotic influences --- bordered with bright, periwinkle-colored Clematis...

My friend Jennifer's gardening style is more intuitive and aesthetically-based than my own. I admire that. Although, my style is eclectic and open to change, as I learn more about the wide cornucopia of plants and gardening in general, I'm way more OCD. Jennifer just sees something she likes and organically senses how to integrate it into her space.


I'm going to try and emulate Jen's style in this post and limit the wordiness, and allow the viewer to simple enjoy the sights...


All photos in this post were taken by Jennifer Matthews, with my thanks.

Thursday, May 14, 2009

No More Dirt Under Your Nail Beds - A Guide to Gardening Gloves

There are many important tools utilized in the garden. The ones I use most often however, are my hands.

No matter how many specialized tools I have, I still end up doing jobs not just by hand --- but with my hands. So, it goes without saying that they need protection --- from the dirty to the downright dangerous.

As a woman, I was annoyed to discover years ago, that most gloves were more suited to chunky-fisted males. While my hands are far from dainty, I still need an alternative. My first encounter with a great-fitting woman's glove was The Original Womanswork Work Glove from womanswork.com. My Mom actually turned me onto them. Made of durable US sueded pigskin, they provide awesome dexterity and protection. They are hand washable and have the super cool "Womanswork - strong women - building a gentle world" embossed on the back of each glove. Their website boasts an impressive collection of gardening gloves for men and women.


Foxglovesinc.com puts out several types of gardening gloves for women. They are form-fitting and have a classic dress glove design in a performance glove (for the more fashion conscious). Their gloves are available in a variety of styles and colors and vow "to keep your hands clean even after a day in the garden". Foxgloves also provide a UPF rating of 50+ for maximum sun protection. They are also machine-washable and quick drying.


Nitrile gloves are a lightweight, breathable and tough work glove. They are excellent for any number of tasks --- spreading compost, weeding, seeding, etc., while keeping hands clean and dry. A great alternative for those with latex or rubber allergies. Nitrile is thin and flexible, but stubborn enough to withstand punctures and even small thorns. They are also extremely affordable. I found them at gardeners.com


Tuesday, May 12, 2009

Now Blooming - Honeysuckle

Lonicera L.


I have two large honeysuckle bushes in my backyard in full bloom. They are lovely ---but what type of honeysuckle do I have? I went to the USDA Natural Resources Conservation Service online database, only to discover that there are over 50 different varieties of the suckers! Does anyone have any idea what's lurking in my backyard? If so, please comment!

Growing What I Eat - Container Gardening vs. Traditional

Behind the house.

The "main" garden space as of May 7th, 2009.


I live on the south end of a major urban area. I decided last summer to make the transition from indoor gardener to enhancing my hard scape and growing outdoors.

I actually have a decent-sized backyard, with plenty of space for all types of gardening. So, why did I choose to garden in containers? It made sense for a variety of reasons:

  • Gardening tasks are easier because I'm working in a small space. Preparing my planting area was a matter of filling containers with pre-mixed soil. I can use hand tools (such as a trowel), as opposed to a spade or rototiller (which I didn't have the money to rent, or the muscle to use). Checking for signs of insect or other pest damage is easier, because the plants are right at hand. Also, preventative measures are easier to undertake because of the smaller number of plants.
  • One exception to easier gardening tasks is watering. With a traditional garden, you can just set up a sprinkler system. On the other hand, going back and forth with a watering can may end up being a pain in the ass. Containers do dry out faster than gardening beds. My solution: I located my main set of containers right next to an outdoor tap. It advantageously happened to be the sunniest area on the property.
  • Containers are mobile. They can be moved around, grouped and regrouped to suit your personal tastes, offer convenience and be moved with changing growing conditions as the seasons evolve.
  • I will most likely not have to deal with soil-borne illnesses. Such things can persist in soil for years and be almost impossible to eradicate.
  • Container gardens hardly ever have weeds.

Container gardening is a great option for the many city dwellers whose gardening space may consist of a porch, deck or patio. Even for those with an existing garden space, placing containers near the kitchen or around the outdoor grill may add versatility and convenience.

Monday, May 11, 2009

Dig This!


I confess to a love of gadgets --- especially helpful ones. I was browsing through the Lee Valley Tools website and few months ago and happened upon The WaterStik. It's an pen-sized moisture sensor that allows you to assess the watering needs of indoor plants with just the push of a button.

I'm not a lazy indoor gardener, but it is difficult to keep track of all of the specific watering needs of the full variety of plants I have. I grow Desert Plants (such as, the Madagascar Dragon Tree, Snake plants and Aloe Vera) to Tropical Plants (such as, Crotons), as well as common indoor plants (such as the Jade plant).

The WaterStik was pretty inexpensive, so I figured, "Why not?" Somewhat to my surprise, the thing really works! And remarkably well, at that. The trick to this gadget is placing the sensor at a specific depth, depending on what type of plant you're dealing with. It comes with a brief Depth Sensor-Plant Guide to move you in the right direction. Then it flashes one of four colors to give you a reading on your plant. Simple. Effective.

Saturday, May 9, 2009

A Turd in My Punchbowl (or Cats in My Garden), Part II


I worked like I was on a chain gang for a few hard hours to dig my Hosta bed. Removing grass, pulling weeds very carefully around the tender young Hosta, and creating space for additional plants. I even put down a layer of Jobe's Recycled Weed Blocker over the newly added Hostas. Then another layer of soil. I thought that I was finished, aside from adding decorative elements and finishing touches. So, I left it at that, overnight.

I woke to find a cruel metaphorical commentary on my gardening efforts right in the middle and along one of the edges of the bed --- cat poop! They had dug and disrupted quite a bit of soil in order to accommodate the release of their feline bowels. I was pissed! All I could do was remove the offending waste, and salvage the bed. I then decided perhaps adding a mulch made of recycled tires to bed might deter the cats, and give my project a more polished look.

The mulch hadn't been down but a few hours when the cats struck again! Just about all of you know what a soiled litter box looks like. So, I'll spare you the incriminating photos. Once again, I cleaned up the mess, this time rearranging the mulch and adding Cayenne Pepper powder.

You guessed it --- the pepper had no effect! At this point I was pretty angry and at my wits end trying to come up with possible deterrents.

I remembered seeing a product on gardeners.com that might be a possible solution. Cat Scat Mats. Prickly plastic mats that can be anchored into the soil of a garden bed or potted plant. These mats don't harm the cats --- just irritate them and keep them from using garden beds or large potted plants as litter boxes. I ordered them straight away only to find them on back order! *Sigh*

I went to local nursery/gardening center to pick up a bottle of dried Coyote urine or Liquid Fence. Anything!

I freshened up the Hosta bed --- again, sprinkling and spraying my deterrants. My fingers crossed. My mouth locked in a snarl with every piece of poop I picked out of the mulch, and every cat I spied.

The very next morning... Failure! Nothing I did had worked. The feral little beasts had bested me once again!

Well, at this point I'm going to have to redo the entire bed, short of uprooting the Hostas. With the Cat Scat Mats on their way, I can only hope that they work.

To be continued...

Growing Powerful Peppers


I must say, I've gone a little crazy with the amount of peppers I'm growing this year. To be exact, two varieties of Bell pepper, four Thai Hot pepper plants and two jalapeno pepper plants.

I took path of least resistance by purchasing transplants, instead of growing from seed. I gleaned from McGee and Stuckey's "The Bountiful Container", not to be seduced into buying tall plants that were already flowering and producing tiny fruits. Instead, opting for the dense, compact plants. If you transplant a plant that is already ahead of the growth curve (producing blossoms and fruit), it may end up permanently stunted. These never turn into vigorous and productive plants. Simply nip off small fruits and blooms to keep this from occurring.

Three micronutrients have a particulary profound effect on peppers, and all of them are contained in common household items:
  1. Sulfur ---in matches. Before tranplanting pepper plants into their containers, take a book of matches and remove the cardboard cover leaving the matches intact. Dig a hole for the plant, lay in one match bunch per hole and cover with an inch or so of soil. Then put in the plant. By the time the plant's roots reach the matches, the sulfur from the matches will have dissolved into the surrounding soil. Sulfur promotes plant protein and increases the nutritional content of the pepper.
  2. Calcium ---in eggshells. Save a few eggshells and leave them out on the counter for a few days until thoroughly dry. Then crush them. (Place them into a plastic bag and run over them with a rolling pin). Sprinkle a spoonful in the bottom of each pepper's planting hole. Calcium prevents blossom end rot, which creates round, black tips at the end of fruits.
  3. Magnesium ---in Epsom Salts, which is also magnesium sulfate, and is therefore a source of sulfur. Mix a bit of salts into plain water and spray the solution on the plants when blossoms begin to appear. Magnesium helps the pepper's fruits develop from flowers, and so promotes higher production.
Peppers respond well to fertilizer rich in phosphorus (the middle number in the fertilizer trinity). If you have some superphosphate, bone meal or bulb food available, mix a bit into the soil around planting time. All are proportionaly high in phosphorus. This micronutrient helps to promote the production of flowers.

One micronutrient you don't want to add to your peppers in nitrogen, or you'll have lots of beautiful foliage and very few fruits.

A Turd in My Punchbowl (or Cats in My Garden), Part I

I was very proud of my first flower bed, even though it consisted of just three Hosta plants. One of the Hostas (the smallest one), is the first plant that I have overwintered outside. It was purchased when Hostas were on sale last Fall. What I didn't know at the time was they can't be kept inside. When I showed it to one of my neighbors, she exclaimed, "What are you doing with that Hosta so late in the year??" I didn't really know myself.

Upon further research and trying to keep the poor thing alive indoors until Spring. I found that if it were to survive at all, before the ground froze, I would have to: cut off what was left of the leaves, dig a semi-deep hole and bury the entire plant upside-down. I insulated it with extra soil and hoped for the best.

In April, after the last snow, I dug up the hibernating Hosta. I discovered that it was in great shape. So, I proceeded to plant it right side up, and wait for the first leaves to emerge. After about a week, it began to sprout! My first success as an outside gardener since I was a child. Everyday, the Hosta seemed to grow larger, stronger and more beautiful.


After a couple of weeks of feeling like a proud parent, I decided to create a Hosta bed. This is when the trouble began...

Search This Blog